The keys to good video for online courses are
1) Keep it simple: don’t overproduce — imagine talking to a student in your office rather than lecturing. But there is nothing wrong with thinking a bit about lighting. Here is a great essay to help you set up three point lighting on a budget. http://ohda.matrix.msu.edu/2012/06/the-art-of-lighting-for-recording-video/
2) Keep it focused: break free of the tyranny of the “class hour” — thinking in terms of 20 minute topical talks rather than 50 minute lectures can help you rethink how to organize the class structure into digestible chunks. Likewise, you can make 2, 5, 10 minute videos to serve as introductions, instructions, assignments, helpful hints, and so on. Uploading a few minute video to help students struggling on an assignment can help to fill in for the times you do similar things in class.
3) Avoid dates and times: Unless you are making a brief video for particular class for a particular assignment — avoid giving dates and times in the video (this makes it easier to reuse later on).
4) Get good sound: as we all know we can put up with poor image quality but bad sound will send us screaming from the room. Fortunately, laptop makers (particularly Apple) have found ways to make good sound input but it is always a good idea to do tests. There are a number of good USB microphones that you can always add. I like the Blue Yeti Or the Blue Snowball. But investing in a nice SpeakerPhone or Headset can make doing all of those Zoom meetings easier and more productive as well as great to use to make videos (I tend to like Jabra but I am not selling anything so look to reviews and ask others what they like).
5) Maintain presence: While a much of your video can and should cover your images and PowerPoints — you talking over slides that appear on your desktop — it is always good to begin and/or end with a shot of you to establish a person behind the course (studies tend to show that presence is a key to good online courses — I will add a bibliography).
6) Use MSU MediaSpace: Not only does MSU give you unlimited video storage but they make it easy to upload, edit, caption, and share your media (video and audio). They also have a great help section —https://mediaspace.msu.edu/help. (Don’t forget to order and use captions).
7) Use KulturaCapture: There are many good desktop applications to capture your videos. One of my favorite is made by a local company TechSmith, Camtasia. However, MSU offers a free and simple, yet powerful, tool called KulturaCapture, that allows you to upload automatically to your MediaSpace. There is an excellent video tutorial (https://mediaspace.msu.edu/help#howdoiaddmediausingcapturespace).
8) Using MediaSpace allows you to seamlessly add to D2L:
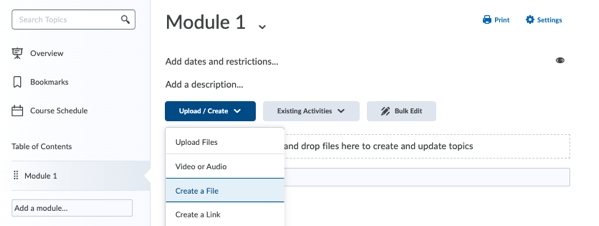
Step One: Build the content of your course by adding a New File.

Step Two: Look for the small media symbol at the far left of the tool bar (small triangle inside of the small black square).

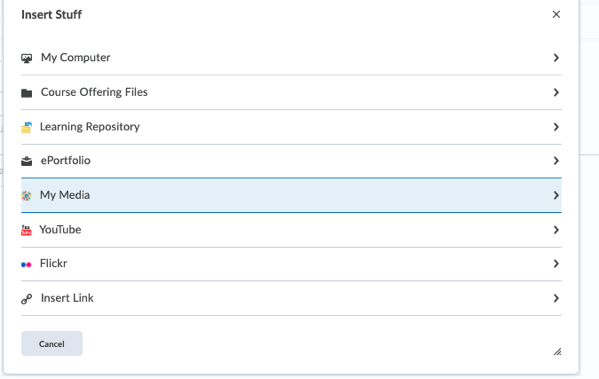
Step Three: Pull down the menu under the media symbol — big menu to “Insert Stuff” that includes “My Media”

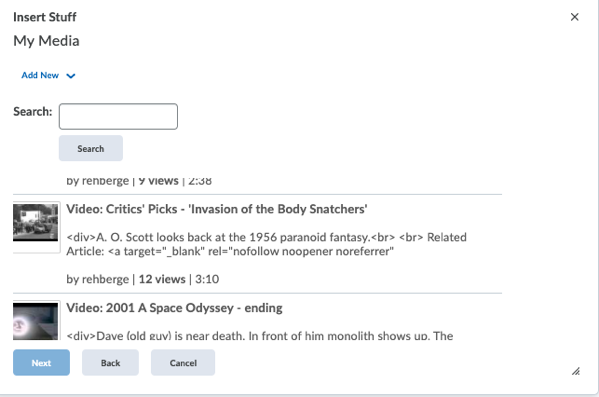
Four: “My Media” is a complete list of all of your files on MediaSpace. Select and add the one you want.

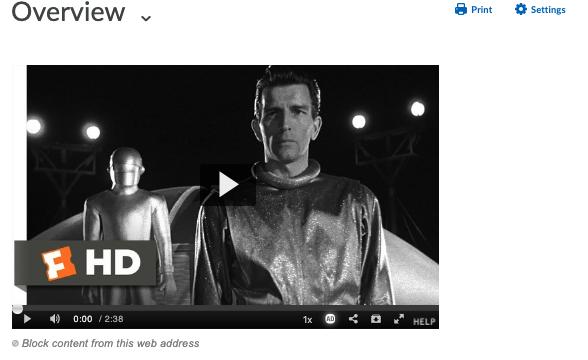
Step Five: Check your video and add more to build out your site.
